Enter food for NutritionData.com analysis or GlycemicIndex.com data
Food Name

Friday, May 30, 2008

Diabetes, Carbohydrates, Protein, and Fat

If you wanted to lower your blood sugar and insulin, what would you do? Eat less sugar and starch? Sounds logical. That would mean you'd be getting more of your calories from protein and fat, since you wouldn't be getting as many of them from carbohydrates.

The interesting thing is that "Fish, beef, chicken, and eggs had larger insulin responses per gram than did many of the foods consisting predominantly of carbohydrate."1. I was surprised when I read about this in the FanaticCook blog, written by an actual nutritionist. In later posts, she dug up more references to studies done on how eating fat affects insulin levels. Turns out, a high-carbohydrate diet was better for insulin levels than a high-fat diet.2 And, as the FanaticCook pointed out, a low-fat vegan diet was better than the AHA-recommended diet for the blood glucose and blood lipids in a 100-patient study.3

The Atkins diet has also been shown to improve blood glucose compared to the average American diet. But studies indicate that the "good carb" diet might do an even better job.2 It would be interesting to see the comparison in a long-term study.

Read all of "Diabetes, Carbohydrates, Protein, and Fat" ...

Tuesday, May 13, 2008

No-knead Bread Fifth Attempt -- qualified success

Last Thursday, following my Fourth Attempt, which I'll call a qualified success (it had considerable sourdoughy character but was as heavy as a rock), I saved a 2-oz lump of the dough to try again. Based on my experience and that of others, I decided my dough was simply overproofed and overhandled. I'm a bit rough on the dough, and I don't think these slack doughs take particularly well to that. So I decided to make a less wet dough. I started with:

2 oz leftover from the fourth attempt
3/4 cup water
3/4 cup King Arthur White Whole Wheat Flour

and let it sit until it was bubbly, after which I added

3/4 cup water
1 1/2 cup King Arthur Bread Flour
1 1/4 cup King Arthur White Whole Wheat Flour

That's a total of 4 cups flour and 1 1/2 cups water, for a dough that was still quite slack but not nearly as wet as the no-kneads I have made so far. A bit later, I realized I had forgotten the salt..., so I added

1 teaspoon salt

And I had to knead that in. I did the kneading with a silicon spatula in the tupperware "rising bowl".

I IMMEDIATELY put the dough in a sealed tupperware in the refrigerator and ignored it until Sunday evening. By the time I had time to think about it, it was 8pm. The dough looked somewhat risen and bubbly, with a slightly leather skin. When I tipped it, it slid a little, displaying the strings in all of its bubbles. I used a tea towel in a bowl as a bread form, gently pulled the leather top skin of the dough all the way around the ball of dough, and formed a kind of seam at the bottom, which I gently nestled in the oat-strewn, tea towel-lined bottom of my bread form bowl, and covered it with a damp tea towel. By 10:30, the ball had risen, though it hadn't quite doubled. But I had to bake this thing so I could get to bed. Following Jim Lahey's advice, I dumped the thing into the preheated casserole (500F), seam side up, covered the casserole, baked, covered for 20 minutes, then uncovered and baked for 30 minutes more at 425F. I used a thermometer to tell me when the center was 205F, at which time I took it out and went to bed. I didn't stay around to listen to it crackling. And I didn't take any pictures.

This loaf was a success. In the oven it rose up in the casserole, pulled away from the sides, and developed a nice rustic crust. Monday morning, I used it for sandwiches. It had a nice sourdough flavor and a crunchy, chewy crust. I thought the interior was a little on the damp side, though the crust had gone slightly past medium brown.

I recrisped the bread in a 350F oven for 15 minutes to serve with soup Monday night, after which it was pretty much gone. Monday night, I made a loaf of my standby bread with buttermilk for the rest of the week.

What went well:

  • The slightly drier dough was easier to handle and harder to deflate
  • The cold, stiff dough was also less delicate than a warmer, softer dough
  • I saved a piece of the fragrant but over-proofed dough for its sourdough organisms.
  • I did all of the first rising in the refrigerator
  • I didn't try to make fiddly little rolls out of it

What I want to do differently next time

  • Add the salt before the final addition of flour
  • Allow more time for the dough to warm up so it can rise before baking
  • Remember to turn the oven down to 425 as soon as the bread goes in

Did you notice the part where I saved 2 oz of dough to start the next batch? Neither did I. So I started over, substituting a spoonful of plain yogurt for part of 3/4 cup of water, and a couple spoonfuls of rye flour for part of 3/4 cup of whole wheat flour, and adding just a pinch of yeast. After that began to bubble, I added 3/4 cup each of water and flour and put the starter in the fridge to fool with later. Next time, I might feel bold enough to try rolls again

Read all of "No-knead Bread Fifth Attempt -- qualified success" ...

Friday, May 09, 2008

No-Knead Bread Fourth Attempt: PostScript


No-knead, no-rise bread
I finally baked this bread after a 7-hour rise. If you can call it a rise when the dough just sort of spreads sideways, wets its tea towel, and produces just one blistery bubble under the crust. And no oven spring. See those slash marks? No expansion at all. My verdict is: over-proofed and overworked.

When I started the dough Tuesday a week ago, with only 1 teaspoon of yeast to 6 1/2 cups of flour, fermentation took off like a shot. I should have put that thing right in the refrigerator instead of letting it sit out on the counter for so long. Only 3 days later, the yeast did not have the strength to raise the rolls I made from half of the dough. I figured it was just a case of over handling while I formed the rolls, and not having the time to wait for them to rise.

When I pulled the dough out of the refrigerator yesterday, though, the yeast had had it. The dough had started to separate, and had produced a watery goo at the bottom. I ignored the warning signs, however, and pressed ahead, remixing the dough and pressing out any remaining gas in the process. Which is what lead up to the seven-hour non-rise. Or was it nine hours? I don't recall.

So I saved 2 ounces of that dough, which had a very sour-doughy aroma, mixed it with 3/4 cup each of flour and water and let it sit until it was bubbly. Then I added the rest of my ingredients and I'm going to try it again. Only this time, I forgot the salt. I'll figure it out, and let the dough sit in my refrigerator until Monday at the earliest. Tune in next week for my fifth attempt at "so simple a 4-year old could do it" no-knead bread.

Read all of "No-Knead Bread Fourth Attempt: PostScript" ...

Thursday, May 08, 2008

No-knead Bread Fourth Attempt

I had been burping a Tupperware bowl in my refrigerator for the last 10 days. It's the dough left over from my previous attempt. After considering the advice of an anonymous commenter, I figured I'd minimize handling the dough this time, making a longish loaf instead of rolls. I opened the bowl, noting an appetizingly sourdough-ish aroma, and prepared to quickly and gently get it into a makeshift couche. But I could see that the dough had separated. Even though I'd kept it in a sealed Tupperware, the top was dried and leathery. Below that was a dough-like dough. At the bottom was a gooey batter. ...

I folded and kneaded the sticky mass in the bowl until it seemed homogeneous. So much for gentle handling. I quickly formed two loaves, putting one in a makeshift couche and the other on a teatowel on the counter. I covered them and left them to rise. Here's the one on the counter.


Before the RiseAfter a 4-hour rise

As far as I can tell, the loaf has spread a bit in the middle, swallowed the oats, and wet the teatowel. I know the yeast is not completely dead -- the 2-ounce scrap of dough I saved to start my next batch is making the Tupperware lid bow up. At one time, the yeast was strong and active. That dough once bubbled up and tried to rise out of the bowl. Now, the yeast is feeble. And I squashed all the gas out of the dough just mixing it back together. Should I let it go another couple hours and hope, or put it out of my misery now?

Read all of "No-knead Bread Fourth Attempt" ...

Tuesday, May 06, 2008

No-Knead Bread Third Attempt

This time, I decided to try the "Artisan Bread in 5 minutes". The dough is not as wet, so it should be easier to handle. And I wanted to try their approach to creating a more sour dough. After all, it was lacto-fermentation that got me interested in the no-knead breads. What I really wanted was crusty sandwich rolls. And, since my last attempt at sandwich rolls was not exactly what I wanted (extra-dense mini-rolls), I decided to try a different recipe.

So, based on the Artisan Bread In 5 minutes recipe, I tried this:
3 cups lukewarm water
1 teaspoon granulated yeast
2 teaspoons table salt
4 cups whole-wheat flour
1 1/2 cups bread flour

I mixed the ingredients on a Tuesday morning, let the dough sit out all day in a loosely-covered Tupperware bowl, then refrigerated until Friday morning, when I let it warm up a bit.

Then I removed about half, which I then cut into 12 pieces, each just under 2.5 oz, and formed into little 5" loaves on a cornmeal-strewn cookie sheet that I intended to use as a peel, and let them rise for 2 hours.

Only, then didn't turn out looking much like the little loaves I expected. Instead of rising up, they spread out. They looked more like coccodrillo loaves. Only flatter. And, when it came time to slide them off the peel onto the baking stone, they wouldn't slide at all. So I put the entire cookie sheet on top of the baking stone, poured hot water in the brownie pan in the bottom of the oven, and baked them for 15 or 20 minutes, during which time they did not spring up....

They were even more stuck to the cookie sheet afterwards than they had been before. It was quite a job getting them off the cookie sheet. They did not crackle as they cooled. They were on the menu Saturday, when they disappeared quickly, as 2 rolls were required for every sandwich . That's 5 ounces of bread for every sandwich. Which is almost my entire RDA of grain, so it seems a bit inconvenient to eat it all in one meal. Especially after I've already eaten 2 slices of bread for breakfast.

Why don't my no-knead breads rise enough? Here are several possible reasons:

  1. Not enough gluten in my flour mixture -- Unlikely. I use 2/3 King Arthur White Whole Wheat (13.2% protein) and 1/3 King Arthur bread flour (12.8%)
  2. Gluten not well-enough developed. That goopy dough gets very stringy when I tip it. Doesn't that mean the gluten developed?
  3. The slack dough is too soft and fragile. Sounds likely
  4. I drive all the gas out while forming the loaf -- likely
  5. The yeast has used up its food source and doesn't give me much during the final rise
  6. The oven is too hot, preventing a good oven spring -- likely

I started with this comment from Alecto, who has taken to adding wheat gluten to Jim Lahy's no-knead recipe. But I wasn't paying attention. I read some comments at the Chocolate and Zucchini posting on no-knead bread, followed on to another discussion at chowhound, and looked up a lot of facts by searching for dough conditioners, rise, and oven spring. I found out:


  1. People have widely-varying ideas of how heavy to make a cup of flour and
  2. Some bakers like to use a dough enhancer like ascorbic acid
  3. Too little kneading gives a weak and sticky dough, while overworking gives a strong but inelastic dough (Dough and Bread Conditioners); ascorbic acid causes oxidation, leading to more disulfide bonds between gluten molecules (Chemistry and Technology of Cereals )
  4. Prevent sourdough from rising horizontally by kneading more, adding more flour, or adding ascorbic acid (baking911 bread problems)
  5. lauralmay's blog pointed me to a "clarified" recipe for the Jim Lahey bread, in which the water weighs about 80% what the flour weighs, instead of the nearly 95% I had figured. That means that Jim Lahey's one cup of all-purpose flour weighs about 140g, not the 125g given in the USDA database
  6. I figured out that I make a cup of flour a pretty consistent 5.3 oz -- 150g. So my really loose dough must be firmer than Jim Lahey intended.

I have a hard time beleiving I am using TOO MUCH flour. I can believe that I am not stirring enough to start the glutens developing.

Here's my plan for the next loaf (to be baked from the "Artisan Bread in 5 minutes" dough in my fridge)

  • Allow the dough to warm up before shaping it
  • Shape very gently
  • Try a loaf or boule, not rolls (too much handling!)
  • Bake at 425F
  • Slash the loaf

I haven't decided whether I'll bake in a casserole, on the stone, or in a bread pan in a large casserole.


Read all of "No-Knead Bread Third Attempt" ...

Tuesday, April 29, 2008

No-Knead Bread Second Attempt

Immediately after my first attempt at no-knead bread (in which I was somewhat disappointed), I decided to try again. Again, I started with Jim Lahey's recipe (1 1/2 cups of water, as recommended in the video). I used two cups of wheat flour and one cup of bread flour, and left out the yogurt this time. I didn't add any flour.

3 cups all-purpose or bread flour, more for dusting
¼ teaspoon instant yeast
1¼ teaspoons salt
1 1/2 cups water

I made up the dough at 10 on Thursday morning, stirring it up until it was well-blended. Because of several interruptions, I am pretty sure I accidentally added the salt twice. But it's really hard to pick it all out again, and doesn't it seem wasteful to throw out all that dough and start over? It seemed a little moister then last time -- just a little too moist to be "shaggy". But I left it on the counter (I could not resist giving it a sort of kneading stir-down a couple of times) until bed time, then put it in the fridge...

At 7 on Friday morning, I pulled the dough out of the fridge. At 9 AM, I cut it into 12 pieces, formed each into a little round oat-studded sandwich-roll and set to rise on a tea-towel well-strewn with rolled oats, and covered them all with another tea towel. Most of the rolls weighed about 2.3 ounces, about the same as Amoroso's sandwich rolls. An hour and a half later, I preheated the bread stone to 500F. At 11, I lowered the oven temperature to 450 and lifted the tea towel. There were my rolls. They hadn't risen much. Maybe they would spring up in the oven? In any case, I didn't have time to mess around because I needed to get them in and out of the oven so I could get to the bus-stop at noon and continue packing for a weekend trip. So I popped the rolls onto the stone, poured some nearly-boiling water into the brownie pan on the shelf below, and baked those rolls for 20 minutes.

They were lovely little things, but really too small for a sandwich. If I hadn't been packing so frantically while also trying to eliminate ants, I would have photographed them for you. Apparently, they were quite popular -- there wasn't even one stale one left for pictures by the end of the weekend, even though had rushed out to buy a bag of Padinha sandwich rolls. Strangely, some family members chose them over another slice of home-made raisin bread. And my daughter actually made sandwiches on them, folding the ham and cheese slices over and over until they fit the tiny rolls.

Here are the problems I had with these rolls:

  • Last rise failed and no oven spring
  • Didn't have the crackly crust

Here's what went better than last time:

  • More flavorful (I probably doubled the salt!)
  • Uniform texture
  • Crust did not seem too tough for the roll.

Where did I go wrong? Did I overhandle the very wet dough, deflating the bubbles beyond what it was able to recover in the 2-hour rise?

So I am going to try another no-knead loaf. This time I will try one "Artisan Breads in 5 minutes" style, at least as far as the flour/water ratio goes. And I want to try the longer-term refrigerator storage. I don't want to double the salt for flavor. And I don't want a soupy dough or a wet loaf. I'll start with the recipe posted in the NY Times and wing it, using my usual 2/3 whole wheat to 1/3 bread flour blend. I made my usual sandwich loaf last night. This will make sandwiches for my family through Friday, so I'll be making bread Friday morning with a dough that's had a long, slow fermentation in the refrigerator. And I'll be wondering how, with every blogger in the US advertising it, the NY Times is suffering such financial hard times.


Edited on 5 May 2008 to correct spelling of Padinha

Read all of "No-Knead Bread Second Attempt" ...

Thursday, April 24, 2008

No-Knead Bread First attempt

I'm only about 18 months late on this hot trend. I was completely aware of the hoopla about no-knead bread. First, it was Mark Bittman's NY Times article on Jim Lahey's no-knead bread from a Manhattan bakery. The food-blogosphere fairly exploded with no-knead covereage and home bakers in record numbers began destroying the knobs on their Le Creuset Dutch Ovens. Then, a year later, another NY Times article reviewed Artisan Bread in Five Minutes a Day, and the same bloggers said this bread was even easier.

Even one of my favorite food bloggers wrote about the joys of no-knead bread. But I was unmoved. All this time, I have had my own, reliable, slow-rise bread recipe. I've been making my bread machine knead the dough in the evening and rise all night until finally baking it early in the morning, finishing just in time to wake me to the smell of fresh-baked bread, ready to slice for sandwich. And I knew that making no-knead bread from a slack dough was not new. Some cooks even insist on kneading slack doughs. But I digress....

What really got me interested in making no-knead bread from a slack dough was a FoodontheFood entry on making sauerkraut at home. I'm not kidding. A discussion of lacto-fermentation ensued, and it got me to thinking about how those pictures of no-knead bread boules look like a really nice sourdough. And I really love sourdough. And I like the shatteringly flakey crust you get on a nice Parisian baguette. Or the flakey crust on a loaf from Sarcone's in Philadelphia. Or the chewy crust on the semi-sourdough loaf I get from Big Sky Bread Company at the West Chester Grower's
So I finally started my own no-knead loaf. I started with Jim Lahey's recipe from Mark Bittman's column. I made up the dough the night before last, substituting a tablespoon of plain yogurt for a tablespoon of water. For lacto-fermentation, of course. I thought the dough was soupy, rather than shaggy, so I added a bit more flour. I let the dough rise overnight, put it in the refrigerator in the morning, took it out again at dinner time and did the 15-second fold over. I baked the bread in a Corning ware casserole (30 minutes covered, 25 minutes uncovered) at 500F until its internal temperature was 205F -- I'm not much good at judging loaves by thumping.

The dough started out shaggy, then bubbly and stringy. Rolled oats kept it from sticking to the tea-towel during its final 2-hour rise. That worked well, but the tea towel really got damp. I plopped the bread into the preheated casserole. The loaf came out beautiful. And it crackled as it cooled, just like a bowl of Rice Crispies. Very exciting.

I cut a slice and it was beautiful -- all full of big holes. The crust was crunchy and crumbly. But not flaky -- it was kind of hard. And, when I got to the center of the loaf, I could see that the holes were much smaller. When I poked at it, the interior was harder, like it had a backbone. It was really moist, too. Not custardy or like a good, moist popover. Moister and tougher at the same time, which didn't seem like a good good.

And the loaf did not seem as tasty as my usual overnight bread machine loaf, which has olive oil and honey to liven it up. The tablespoon-full of yogurt definitely did not do anything for the loaf. Now I can see, among all the raves, some criticisms, adjustments, and rejiggerings of the no-knead recipes. I've even seen as assertion that Peter Reinhart's recipe for pain à l'ancienne is much tastier. Since it has exactly the same ingredients in similar proportions, I don't know why. But I would like to find out.

Here are the problems I had with this boule


  • Too moist
  • Hard, dense interior
  • Not very flavorful
  • Crust hard and brittle, not flakey and brittle
I think the first thing I need to do is lower the baking temperature. Maybe the outside of the loaf gets cooked before the interior has a chance to spring up in the oven. Probably making baguettes or rolls would have less of a problem. So now I am working on batch number two, which I will make into sandwich rolls. It is fermenting away on my counter right now. No yogurt this time., The dough seems just a tad moister than "shaggy". I'll see how it turns out.

Read all of "No-Knead Bread First attempt" ...

Friday, April 04, 2008

Baked cod with garlic ginger oil

Last night for dinner, I made a bunch of dishes "match", like they really belonged together in the same meal. Even though they were really just a bunch of things I pulled out because I decided they needed to be eaten.

  • 1 pound of mahimahi fillets
  • 1 spaghetti squash
  • 1 pound of fresh broccoli
  • Leftover rice
  • A green salad

I started with an idea approximately like this recipe for baked fish, but didn't really feel like using jerk- or Cajun- style seasonings again. I knew the kids insist fish is only good with ponzu sauce, and that spaghetti squash always seems to come out too watery and crisp or else overcooked and mushy. I had a moment of discouragement and panicked. Some part of me reached about 20 years back, to a time when my only seasonings were powdered garlic, powdered ginger, and soy sauce. Since then, though, I've learned a few things....


You can finish baked spaghetti squash in a pan to drive out extra water and control how much it cooks. Lemon juice is really good on fish. Ponzu sauce has citrus and sweetness in it. You need oil to finish baked spaghetti squash in a skillet. You can use the same oil to dress the baked fish, and broccoli tastes good with a little bit of oil, too.

So I came to my senses and did something like this:

  1. Split a spaghetti squash in half the long way, forced the halves, face-down, into a pretty baking dish with 1/4 cup of water, covered it, and microwaved for 10 minutes
  2. Heated a large skillet, then added 2 tablespoons of olive oil, 1 huge clove of garlic (minced), and a small knob of fresh garlic (minced), left it cooking slowly over low heat for about 10 minutes, and then turned off the heat.
  3. Cut up the broccoli crowns, put them in the steamer basket over water in the saucepan, ready to go.
  4. Took the hot squash out of the microwave and dried the baking dish
  5. Put the fish fillets in the same baking dish (this was my second-cleverest idea all evening), squirted them with lemon juice, spooned a tablespoon or less of the garlic-ginger oil on them, and sprinkled them with sugar and just a tiny bit of low-Sodium soy sauce.
  6. Spooned a little bit of oil into a very small bowl, to save it for the broccoli
  7. Scraped the spaghetti squash into the skillet with the rest of the seasoned oil, and gave it a good stir to break it up into strands and mix the oil around a bit.
  8. Then I waited until twenty 'till dinner time and preheated the oven to 350°F
  9. At quarter 'till dinner time, I put the baking dish in the oven.
  10. At ten 'till, I turned on the heat under the broccoli (high) and the squash (medium). While the broccoli steamed, I stirred the squash strands as gently as I could with a pair of tongs to finish them cooking evenly, drive off the excess water, and make sure the flavor was evenly distributed. Then I turned off the heat and put the lid on the squash.
  11. At 5 'till, I pulled leftover rice out of the refrigerator, and popped it into the microwave for 3 minutes.
  12. At 3 'till, I took the broccoli out of the steamer and dressed it with the reserved oil and just a drop of soy sauce.
  13. At dinner time I pulled the baking pan out of the oven and set it on a trivet on the table.
  14. I added a tiny sprinkle of soy sauce to the squash and brought everything else to the table.

If that sounds too good to be true, it's the "something like" talking. Actually, I had already dressed the fish with powdered garlic and ginger before I realized flavored oil would be better and just as easy. The waiting in steps 8 and 9 was not as relaxing as you might think, as I spent the time shouting at the kids to clear and set the table instead of playing with the accumulated toys, newspapers, and junk mail. I didn't actually do step 6. Instead, I scraped the squash into a large bowl and left the oil in the skillet until the broccoli was ready. I had thought I might serve the squash in the bowl, but the bowl was cold by serving time and I served the squash in the skillet. It's a nice-looking skillet. Sometime during step 10, I checked the fish, panicked, and turned the oven up to 400°F. I didn't make the rice myself -- my husband had made it to go with his Red Stripe chili the night before. And did you notice the salad was MIA? I discovered a lettuce shortage during step 8. But it's the thought that counts. I chopped up extra broccoli.

Fish baked this way is just about foolproof (why did I panic?), and looks smashing on a bed of spaghetti squash. The kids didn't even complain about it (much). The spaghetti squash was seconds-worthy, the broccoli was just as good as always and maybe a little better. The rice was as good as it had been the night before, and nobody asked about the salad. This was a successful 50-minute weeknight meal. If I had known what I was doing, I probably could have done it more quickly, but I still would have had to allow time for the fish to thaw.

Baked Fish Dinner with Garlic Ginger Oil

Recipe By: Family Nutritionist
Serving Size: 4
Cuisine:
Main Ingredient:


-= Ingredients =-
3/4 pound raw fish fillets
1 teaspoon Lemon juice
2 tablespoon Olive oil
1 clove garlic
1/4 oz Fresh ginger
1/2 pound Spaghetti Squash
2 cups Broccoli florets
4 cups Romaine
1 tablespoon Low-sodium soy sauce
2 cups Cooked brown rice

Serving: 3 oz fish, 1/2 cup each broccoli, spaghetti squash, and rice, 1 cup romaine (346g), Calories: 279: Fat: 8g : Sodium: 208mg
Protein: 20g, NetCarbs: 28, K: 754mg
SatFat: 1g, PolyFat: 1g, MonoFat: 5g, Chol: 37mg
TotCarbs: 31g, Fiber: 3g, Sugars: 1g
Calories: 28.0% from fat, 44.4% from carbohydrates 07.2% from protein

DASH: Vegetables: 3.0: Fruits/Juices: 0.0: Dairy: 0.0: Grains: 1.0: Meat/Fish: 1.0: Seeds: 0.0: Fats: 1.5: Sweets: 0.0
USDA: Vegetables: 1.5: Fruits/Juices: 0.0: Dairy: 0.0: Grains: 1.0: Meat/Fish/Seeds: 1.0: Fats: 1.5: Sweets: 0.0


Edited on 7 April 2008 to correct errors in nutritional information and to add the rice, which I had left out of the original posting.


Nutritional information in this post calculated using bigoven. Food Group Servings calculated in EXCEL using http://www.mypyramid.gov/ and DASH diet references

Read all of "Baked cod with garlic ginger oil" ...

Caribbean Flavor: Jamaican-Style Jerk Ribs

We were planning to have a few people over (11 or 14) to make some summer plans, it was March, and everyone was tired of winter. So something warm and cheery was in order. My husband wanted ribs. So I immediately thought of a Caribbean-inspired menu. Just as soon as I had stumbled across the Caribbean Getaway Menu on the Wegmans website. It was only a starting point. I made ribs instead of a roast, forgot about shrimp, decided on a straightforward Cuban black bean soup, made up my own recipe for greens, cut the desserts down to one, and decided on a blend of tropical fruit juices (with or without rum) instead of the Mojito.

I've done dry-rubbed pork loin short ribs before. They really take up the flavor of the rub well, so I made up a jerk-style dry rub based on several recipes I've read. We were lucky enough to get 90 minutes of good weather that day. The aroma and flavor were really wonderful. I made sure to have tangy barbecue sauce available, but I enjoyed the ribs just as they came off the grill, with mango rice and a side of greens. ...

Jamaican-Style Pork Spareribs

-= Ingredients =-
~~ Jerk Seasoning (see recipe) ~~
2 lb Pork spareribs

-= Instructions =-
Rub Jerk Seasoning onto all surfaces of ribs. Marinate in refrigerator for at least 2 hours.

Place ribs in center of cooking grate. Grill (indirect, medium heat) 1 to 1 1/2 hours or until tender.

Cut ribs into 2 or 3-rib portions. Serve with warmed sauce.

Nutritional Information (not including rub or barbecue sauce):
Serving Size: 1/3 of rack ( 157g): Calories: 454: Fat(g): 32 (69%of Cals): Sodium (g): 117
Protein: 26g, NetCarbs: 4, K: 432mg
SatFat: 14g, PolyFat: 3g, MonoFat: 15g, Chol: 118mg
TotCarbs: 5g, Fiber: 1g, Sugars: 3g

Food Group Serving(s)
DASH: Vegetables: 0.0: Fruits/Juices: 0.0: Dairy: 0.0: Grains: 0.0: Meat/Fish: 1.2: Seeds: 0.0: Fats: 0.0: Sweets: 0.0
USDA: Vegetables: 0.0: Fruits/Juices: 0.0: Dairy: 0.0: Grains: 0.0: Meat/Fish/Seeds: 3.7: Fats: 0.0: Sweets: 0.0

Jerk Rub for Jamaican Style Pork Spare Ribs


-= Ingredients =-
2 tablespoon Onion powder
1 tablespoon Sugar
1 tablespoon dried thyme
2 teaspoon Salt
1 1/2 teaspoon Allspice
1/2 teaspoon Ground nutmeg
1/2 teaspoon Ground cinnamon
1 teaspoon Cayenne

-= Instructions =-
In a small jar with tight-fitting lid, shake together all dry ingredients until well-blended. Rub dry mixture onto all surfaces of ribs. Marinate in refrigerator for at least 2 hours.

Serving: 1 tsp (3g), Calories: 8: Fat: 0g (13% of Cals): Sodium: 278mg
Protein: 0g, NetCarbs: 2, K: 15mg
SatFat: 0g, PolyFat: 0g, MonoFat: 0g, Chol: 0mg
TotCarbs: 2g, Fiber: 0g, Sugars: 1g


Nutritional information in this post calculated using bigoven. Food Group Servings calculated in EXCEL using http://www.mypyramid.gov/ and DASH diet references

Read all of "Caribbean Flavor: Jamaican-Style Jerk Ribs" ...

Thursday, April 03, 2008

Caribbean Flavor: Coconutty Fruit Salad

The sweetened, flaked coconut makes this fruit salad sweet enough for a light dessert, and is welcome after a filling meal of soup, rice, greens, a nice salad, and Jamaican-style Jerk Ribs, corn muffins, and appetizers.

Coconutty Fruit Salad


-= Ingredients =-
3/5 cup Sweetened Flaked coconut
1/3 pound mango
1/3 pound Pineapple
1/3 pound Papaya
3/10 Lime juice

-= Instructions =-
Toast coconut in dry pan on medium flame, about 10 minutes. Stir frequently, and watch carefully.
Combine fruits and lime juice with coconut in bowl. Garnish with mint leaves, if desired.

Serving Size: 1/2 cups( 86g): Calories: 75: Fat(g): 2 (31%of Cals): Sodium (g): 20
Protein: 1g, NetCarbs: 12, K: 159mg
SatFat: 2g, PolyFat: 0g, MonoFat: 0g, Chol: 0mg
TotCarbs: 14g, Fiber: 2g, Sugars: 11g

Food Group Serving(s)
DASH: Vegetables: 0.0: Fruits/Juices: 1.0: Dairy: 0.0: Grains: 0.0: Meat/Fish: 0.0: Seeds: 0.3: Fats: 0.0: Sweets: 0.2
USDA: Vegetables: 0.0: Fruits/Juices: 0.5: Dairy: 0.0: Grains: 0.0: Meat/Fish/Seeds: 0.3: Fats: 0.0: Sweets: 0.2


Nutritional information in this post calculated using bigoven. Food Group Servings calculated in EXCEL using http://www.mypyramid.gov/ and DASH diet references

Read all of "Caribbean Flavor: Coconutty Fruit Salad" ...

Wednesday, April 02, 2008

Caribbean Flavor: Mango Rice

In a menu that's full of Caribbean flavor, plain rice just seems so plain. It doesn't take much to boost the flavor, though. In a pinch, you can skip the whole "broil the scallions" step.

-= Exported from BigOven =-

Mango Rice

Recipe By:
Serving Size: 8
Cuisine: Caribbean
Main Ingredient: Rice
Categories: Vegan, Steam, Side Dish

-= Ingredients =-
1 1/3 cup Long grain rice ; jasmine or doongara
1/2 tablespoon Vegetable oil ; or butter
3 medium Scallion
1 medium mango ; 1" dice
1/2 Lime juice

-= Instructions =-
Prepare rice according to package directions.

Toss green onions with olive oil; broil 4-5 minutes and slice into narrow rings.

Fluff rice in large bowl; toss with onions, mango, and Lime juice

Serving Size: .6 cup (132g) Calories: 297: Fat(g): 5 (16%of Cals): Sodium (g): 7
Protein: 3g, NetCarbs: 27, K: 127mg
SatFat: 0g, PolyFat: 0g, MonoFat: 1g, Chol: 0mg
TotCarbs: 29g, Fiber: 2g, Sugars: 4g

Food Group Serving(s)
DASH: Vegetables: 0.0: Fruits/Juices: 0.25: Dairy: 0.0: Grains: 1.0: Meat/Fish: 0.0: Seeds: 0.0: Fats: 0.2: Sweets: 0.0
USDA: Vegetables: 0.0: Fruits/Juices: 0.1: Dairy: 0.0: Grains: 1.0: Meat/Fish/Seeds: 0.0: Fats: 0.2: Sweets: 0.0


** This recipe can be pasted into BigOven without retyping. **
** Easy recipe software. Try it free at: http://www.bigoven.com **

Nutritional information in this post calculated using bigoven. Food Group Servings calculated in EXCEL using http://www.mypyramid.gov/ and DASH diet references

Read all of "Caribbean Flavor: Mango Rice" ...

Monday, March 31, 2008

Food Safety: Cutting out Cantaloupe Cross Contamination

Here's the thing: I don't wash much produce. Not Bananas, oranges, apples, winter squash, zucchini, green peppers, or green beans. Not even broccoli or cantaloupe. Unless it seems dirty. I always wash leeks, lettuce, spinach, kale, collards because they always have silt or sand in them. I generally wash potatoes, carrots, and beets, because they grow underground and "might" be dirty. I don't wash waxed rutabagas before I peel them. I really don't obsess about whether food I am just about to cook might have a few invisible germs on it.

And my family is fine.

All the recent talk about how difficult it actually is to rinse, soak, wash, bleach, or scrub the germs off the surface of a cantaloupe got me wondering. The discussions at Fanatic Cook raise a lot of valid points about how hard it is to make sure you've gotten rid of something you can't even see. So I found this video from the International Food Safety Network refreshing. Instead of instruction in eliminating the invisible, it counsels cutting down on cross contamination. At six minutes, it seems a little long. So I'll summarize:

  • It is really hard to scrub the germs off a cantaloupe.

  • You might splash wash-water all over the place.

  • Instead, cut down contact between the outside and the inside

  • Cut the (unwashed) cantaloupe into quarters. You won't spread many bacteria to the flesh.

  • Now use a clean knife to separate the flesh from the rind.

  • Slide that flesh onto a clean cutting board. Wash your hands before you handle the flesh further.

  • Refrigerate the cut cantaloupe immediately.

Of course I routinely wash my hands before cooking, even thought they don't look dirty. But, for some reason, I just can't see doing the same with the produce, and this approach makes more sense to me.

Read all of "Food Safety: Cutting out Cantaloupe Cross Contamination" ...

Friday, March 28, 2008

Food Safety: Familiarity Breeds Fear

In the US, we now keep track of more information about our food supply than we ever did before. Even eggs now have individual tracking codes. Bacteria can get their DNA fingerprints checked. This makes it possible to say that 50 gastroenteritis patients all carry the same strain of Salmonella, and all ate cantaloupes from a single farm in Honduras.

Lately, we hear more and more stories like this. We seem to hear more and more stories about how some food or food product is making people sick, and wonder: Is this a new threat to our food supply? I don't think so. But, then, I don't really know. I went looking for summaries of cases food-related illness, hoping to see some per-capita trends. But it wasn't that simple. Because it is really tough to get a handle on how many people are getting sick. Many of them don't go to the doctor. Many doctors don't take samples to be cultured. How many? Who can tell? Maybe the rate of "underreporting" as it is called is changing. How much? Who can tell? How many of these illnesses are caused by food we buy in the supermarkets? That's hard to tell, too. It is clear, though, that things are changing. Supermarkets, warehousers, shippers, packers, and farmers are all required to keep more comprehensive and elaborate records than they've ever kept before, and the CDC is working hard to get doctors to check more carefully for evidence of foodborne illnesses.

Just exactly how did the FDA link 50 cases of Salmonella in 16 states with cantaloupes from a single farm in Honduras?

"The CDC monitors the frequency of Salmonella ... and assists ... Health Departments".1 The CDC had to recognize 50 or more Salmonella patients (0.000017% of the US population) as a significant increase in frequency, quite separate from gastroenteritis patients with E. Coli, Giardia, virus or other infections, or no infections at all. For each of those 50 or more patients, there was a physical examination, stool sample collection and culture, and an expensive DNA test to determine how many had the same strain of Salmonella. According to the CDC, the FDA collaborated with the CDC and state health officials to ask a lot of questions about everything the infected people had eaten recently. And compare that to everything a bunch of uninfected people had eaten recently. They would have had to consider all the eggs, milk, poultry, beef, and produce the patients had eaten, as well as any pet turtles or other domesticated or wild animals or animal poop they may have come in contact with. They needed to figure out if the infections came from restaurants or if the foods came from grocery stores. They studied data collected between January 18 and March 5, and concluded that "cantaloupe is the likely source of infections".2

At some point, the FDA started a "traceback investigation" in which they needed to figure out where every bite of cantaloupe had come from, and figure out how it had gotten there, long after the food itself was gone. They needed to figure out if the infections had come from restaurants or supermarkets, from delivery trucks, food warehouses, ships, or trains, a packing house, or a farm. There must have been a team assigned to build and use a database of information from infected and uninfected people, grocers and warehouses and shippers, following all the paths the cantaloupes might have followed. Eventually, they eliminated all other leads, reported that "[p]reliminary results ... indicate that cantaloupes consumed by ill persons were grown in Honduras,2 and issued a statement that they all came from one farm.3

I can only guess about all the steps involved. Can you imagine the number of man-hours involved in this investigation? The medical and lab supplies used? Computer power required to build a database of every food the patients ate? Resources used by grocers, truckers, warehouse operators, and other shippers to maintain the records that made it possible to traceback all that food and determine that the only thing those 50 patients had in common was the farm their cantaloupes were grown on?

This kind of investigation simply was not possible even ten years ago. The pieces have only fallen into place recently -- you can see the evidence in the farmer's name on every piece of fruit, and the tracking code on every egg.

Ten or fifteen years ago, this outbreak might not have been recognized. Fifty cases out of 300 million is only 0.000017% of the US population. The CDC might not have been able to connect 2 cases of gastroenteritis in one state to 2 cases of Salmonellosis in another. And no-one could have traced individual pieces of produce back to the farm they grew on in another country. The records simply were not there. But now they are. Since it was established in 1996, FoodNet (a collaborative effort by the CDC, FDA, USDA and state health departments) has expanded to include 15% of the US population in 10 states.4

So expect more bad news about produce, simply because the news is available. FoodNet reports make clear that the incidence of laboratory-confirmed infections by commonly-foodborne pathogens has increased in the past couple of years after a few years of decreases. But FoodNet does not make it clear how much of this increase is due to an increase in reporting. Their 1999 discussion of assumptions made in surveillance of foodborne illness makes it clear that they don't have a handle on just how accurate these assumptions are.5 But it is clear that as we become more and more familiar with stories of foodborne illnes, we are growing more and more fearful of our food supply.

And I still can't tell: Are things getting worse, or are we just better informed! As long as foodborne illness underreporting rates keep changing, it is going to be difficult to talk about the true rate of change in foodborne illnesses in this country. The CDC publishes weekly tables of the incidence of notifiable diseases in its Morbidity and Mortality Weekly Report. That's a lot of data! I certainly can't make sense of it in an afternoon. I don't have the knowledge and experience to make sense of it in a week or two. I don't even know what field I'd need to study in order to learn how to make sense of it, and what assumptions the experts make.

So I am going to wait for the experts to duke it out, knowing full well that the evidence will seem to point first in one direction and then in another. In the meantime, what am I going to eat?

1. Salmonellosis: What is the government doing, US Centers for Disease Control, as of March 28, 2008
2. Investigation of Outbreak of Infections Caused by Salmonella Litchfield US Centers for Disease Control, March 22, 2008
3. FDA Warns of Salmonella Risk with Cantaloupes from Agropecuaria Montelibano, US Food and Drug Administration, March 22, 2008
4. Preliminary FoodNet Data on the Incidence of Infection with Pathogens Transmitted Commonly Through Food --- 10 States, 2006, FoodNet, April 13, 2007
5. Food-Related Illness and Death in the United States, CDC FoodNet, Emerging Infections Diseases V5No5, September-October 1999

Read all of "Food Safety: Familiarity Breeds Fear" ...

Thursday, March 27, 2008

Red Lentils with Bengali Spices

One day, when I had run out of dinner ideas, I decided to do something with the red lentils I'd had in my pantry for months. Of course I had no idea what to do with them, which is why they had been sitting for so long. But a quick online search turned up several recipes. Some call for cooking the lentils no more than 10 minutes, while others call for more than 30 minutes.

Red lentils, with their skin removed, split the way split peas are split. They cook very quickly. I concluded that, if you want the lentils whole, you should cook them for no more than 20 minutes. If you want a pureed texture, cook them for 30 minutes or more. They are also called pink lentils or masoor dal. They turn from red to yellow during cooking, which really surprised me.

I picked a recipe called Bengal Red Lentils with Spices, which called for Bengali Panch Phoron, a simple five-spice mix. I didn't have all the spices, but I didn't let that stop me. I substituted butter for usli ghee (clarified butter), and used a bit less. I substituted a little jalapeno for the green chilis, and cayenne powder for the dried red chilis. I left out the Nigella entirely. Instead of Fenugreek seeds, I added just a little imitation maple flavor (which is mostly fenugreek) to the finished dish.

From the moment I started frying onions, tomatoes, and ginger in a little butter, the kitchen filled with a wonderful smell. When I started frying my panch phoron substitute, the whole house became fragrant. My children asked me if I had some Indian food. Not quite, but something a little bit like it. What I came up with is not authentic Bengali cooking, but it is a quick, delicious dish that features some flavors from Bengal. If it becomes a regular on our menu, I may even buy some Nigella or Fenugreek for even more flavor. And the next time I visit an Indian Restaurant, I'll look for Bengali specialties like Red Lentils with Panch Phoron, to find out what I have been missing.

-= Exported from BigOven =-

Red Lentils with Bengali Spices

Based on a recipe from Classic Indian Vegetarian and Grain Cooking by Julie Sahni, this recipe is adapted to use ingredients which are common in many parts of the US.

Recipe By: Family Nutritionist
Serving Size: 8
Cuisine: Indian
Main Ingredient: Lentils
Categories: Vegetarian, Advance, Vegetables, Side Dish, Main Dish

-= Ingredients =-
~~ Boiling the dal ~~
1 1/2 cup Red lentils (masar dal)
1/4 Jalapeno peppers
1/2 teaspoon Turmeric
4 1/2 cup Water
1/4 teaspoon Salt ; or to taste
~~ Tomato-Onion paste ~~
1 tablespoon Unsalted butter
1 cup Onion ; minced
1 cup Tomatoes
1 tablespoon Fresh ginger ; grated or crushed
~~ Perfumed Butter ~~
1 tablespoon Unsalted butter
1/2 teaspoon Cumin seed
1/2 teaspoon mustard seed
1/2 teaspoon Fennel seed
1/2 teaspoon Nigella seed ; (also called onion seed, black sesame, black cumin, kalonji)
1/2 teaspoon Fenugreek seed ; (imitation maple flavor contains Fenugreek)
4 Bay leaves
1/2 teaspoon Cayenne ; or crushed red pepper (piquin)
2 teaspoon garlic ; minced

-= Instructions =-
1. Pick, clean, and wash the red lentils. Add to a deep pot with chilies, turmeric, water, and salt.
and cook the red lentils, chilies, turmeric, salt and water. Put the ingredients in a deep pot; bring to boil. Stir often to make sure they do not lump together. Cook over medium heat for 20 minutes, or until tender. The lentils will turn yellow.

2.While the lentils are cooking, heat butter in a frying pan over medium heat. Add the onions and fry until golden brown (about 10 minutes). Add the tomatoes and continue frying until the tomatoes are cooked. Add the ginger, and continue cooking until the mix is a uniform thick pulp, about 8 minutes. Add the tomato-onion paste and salt to the cooked lentils.

Serving: 2/3 cups (215g), Calories: 167: Fat: 4g (21% of Cals): Sodium: 84mg
Protein: 10g, NetCarbs: 20, K: 304mg
SatFat: 2g, PolyFat: 1g, MonoFat: 1g, Chol: 8mg
TotCarbs: 25g, Fiber: 5g, Sugars: 1g

DASH: Vegetables: 0.5: Fruits/Juices: 0.0: Dairy: 0.0: Grains: 0.0: Meat/Fish: 0.0: Seeds: 0.9: Fats: 0.8: Sweets: 0.0
USDA: Vegetables: 0.3: Fruits/Juices: 0.0: Dairy: 0.0: Grains: 0.0: Meat/Fish/Seeds: 0.9: Fats: 0.8: Sweets: 0.0


** This recipe can be pasted into BigOven without retyping. **
** Easy recipe software. Try it free at: http://www.bigoven.com **


Nutritional information in this post calculated using bigoven. Food Group Servings calculated in EXCEL using http://www.mypyramid.gov/ and DASH diet references

Read all of "Red Lentils with Bengali Spices" ...

Tuesday, March 25, 2008

Food Safety: When do you wash your produce?

There's an interesting discussion going on at the Fanatic Cook blog. It began with Honduran cantaloupes that are associated with a Salmonella outbreak in the US.

Of course, produce grows outdoors in the dirt. Animals poop outdoors in the dirt. Contamination from passing birds, livestock, or vermin is always a possiblity. When I buy a melon directly from the farmer, it is dirty. Before I slice it, I give that melon a good rinse and scrub-down in the sink. Afterwards, I give the sink a soapy scrub-down to clean it. This keeps the dirt, and the germs in the dirt, off the counter, cutting board, and knife, and out of the food.

But when I buy a melon at the supermarket, it looks as clean as if I had just washed it myself. So I don't wash it. I rarely wash apples, oranges, or tomatoes. I have never washed a banana. Have you? Even though you know that, every time you grab a piece of produce, you could get invisible germs on your hands and spread them all over the kitchen? Why aren't you and your family sick every single day? Is this like playing Russian Roulette with vegetables?

Well, maybe. Most tragedies happen after a whole string of things has gone wrong. And there are many opportunities between the field and the plate to prevent a food-borne illness.

Most soil germs are not dangerous. But fertilizer/manure or irrigation water could be contaminated and spread germs in the field. The dirty-looking recirculated wash water they use in packing plants could be OK if they treat it properly, or it could be putting germs right back on the potatoes. Workers could be protecting the food, or contaminating it if they don't wash their hands. And you never know who has handled the produce in the grocery store.

Knowing all that, I'm responsible for the food I choose and how I handle it. I follow a few simple rules.

  • Vegetable washes haven't proven to be any more effective than plain, clean water at removing bacteria, so I stick with plain water, and scrub, rub, agitate, or spray.
  • Keep the sink and the scrubbers clean.
  • There is no way to remove 100% of the germs on foods. So try not to let the germs grow. Eat, cook, or refrigerate things soon after you cut them.
  • If those watermelon slices start to look "different", it's time to toss them. Avoid damaged produce. Don't eat rotten stuff.
  • This summer, I'm sure I'll still be eating unwashed vegetables straight off the vine.
  • I'm not going to start washing bananas.
  • I'll think again about prewashed mini-carrots, but I'll probably keep trusting the Jolly Green Giant, the distribution network, and my local grocery store.


FIT vegetable wash powder (Citric acid, sodium lauryl sulfate, sodium carbonate & magnesium carbonate, Grapefruit Oil extract) was developed by Proctor and Gamble, which then sold the license to Healthpro Brands. It is distributed to growers, packers, and shippers by Caruso Foods

According to the Cornell Department of Agriculture, no-one knows how much food-borne illness originates on the farm.

Bleaching produce is only recommeded in extreme situations, such as flooding. Leafy vegetables, fleshy vegetables (tomatoes, summer squash, peppers) and berries cannot be adequately disinfected. Other contaminated vegetables can be cleaned in fresh water and then soaked in a very weak chlorine solution for 15 to 20 minutes.

Did you hear A&P sued a couple of its former stock clerks for making a video in which they licked produce and put it back on the shelves?

Read all of "Food Safety: When do you wash your produce?" ...

Tuesday, March 18, 2008

Greens -- Spinach and Chard


Spinach
Spinach was the only cooked leafy vegetable I'd had growing up. In the early seventies, apparantly, it was only available frozen -- precooked and compressed into a frozen brick. It cooked up so limp, slippery, and stringy it could slip down my throat while I was still chewing. It was not my favorite vegetable.


Chard
Then, one year, my mother planted chard. It was like spinach, but not really. It came straight out of the garden, fresh and green. Cooked, it was slightly sweet, something I could sink my teeth into. We ate a lot of it, too. I remember watching the stockpot lid slowly settle as the enormous pile of chard subsided under the influence of steam. And the tiny baby chard leaves oftened livened up our green salads.

Later, we had the chance to try fresh baby spinach, too. It was a novelty, and we always had it as a salad, with a slightly sweet dressing that featured bacon and chopped eggs.

Now, chard, triple-washed baby spinach are available every day at the grocery store, and (in season) at farmer's markets. Sometimes, I can even get great-looking beet greens. I've tried them all in salads, in soups, and as a vegetable side.

Spinach is so tender I still prefer it raw, quickly sautéed, or added to a soup. Chard can stand up to being served as a cooked vegetable, and my kids prefer it to Collards, Kale, Mustard, or Turnip greens.

Read all of "Greens -- Spinach and Chard" ...

Friday, March 14, 2008

Greens -- an introduction


Fresh Greens

I was just reading 5 Super Ingredients by Melanie at dietriffic. She just discovered an Asian green called Choy Sum, and gave a stir-fry recipe. She says she means to add more greens to her diet. It's a good idea. People have been eating greens for a long time, but where meat and carbohydrates are cheap, people seem to start leaving greens off their plate, which is a shame. Greens are the green leaves of non-heading herbaceous plants, eaten as vegetables. They are generally rich in vitamins A, B (including folate), C, E, and K, as well as antioxidants and have varying amounts of the minerals magnesium, calcium, potassium, and iron. Heading cabbages (red and green), iceberg lettuce, and Belgian endive are pale by comparison and so are not treated as greens. They don't develop nearly as many nutrients.

Serving Size
Fresh raw greens, torn or sliced, are fluffy, but will compact when you cook it. To get a half-cup serving of spinach, you'll need to eat a full cup of raw spinach salad, or a quarter cup of well-cooked spinach. Collards, kale, and other, more sturdy greens, won't compact quite as much as spinach will.

Preparing Greens
Very young greens are tender and can be eaten with their ribs, veins, and stems. Sturdier and more mature greens may have tough or bitter stems and veins, which need to be torn or stripped out. Large Romaine lettuce can be torn away from the thickest, whitest portion of its stem. With sturdy collards, grab the stem with one hand, wrap your other hand around the leaf, and strip it right off the vein.

Greens grow close to the ground, so they can be sandy or muddy. If you've got just 4-5 leaves of Romaine for your salad, you can give them a quick "shower" under running water. If you've got a couple pounds of greens, give them a bath in a large bowl or your well-cleaned sink. Agitate the leaves, let the dirt settle, scoop out the leaves, rinse the sink, and do it again. Check the bottom of the sink for dirt and sand. If you got it all, you are done.

To quickly chop a big pile of greens, stack a few up, roll them around their central veins, and slice them into ribbons with a chef's knife. You can turn the mass of ribbons sideways if you like and slice them into rough rectangles.

Most types of greens don't need to cook long -- five minutes or less for very tender young greens, 10 minutes for most sturdy large-leafed greens, 20 minutes for really tough, mature leaves, and longer for certain greens that contain a lot of oxalic acid.


Lettuce is a members of the daisy family. Many Western varieties have been bred for mild flavor to be used in fresh salads, while many more bitter Asian varieties have been bred for use in cooking. They all belong to the same species. People have been eating lettuces for over 4000 years. The darker green loose-leaf lettuces have lots of vitamins and minerals and a mild flavor. A popular way to serve lettuce in the US is in a green salad.
Endives, Radicchio and Escarole are all related to chicory, another member of the daisy family. Most are more bitter than lettuces. While Radicchio and curly endive are used in fresh salads, escarole is usually served served as a cooked green or as a soup.


Spinach, Chard (Silverbeet), Beet Greens. Chard and Beets are different varieties of beet, while spinach is a close relative. These greens have a mild flavor. Young leaves are used fresh in salads while older leaves are cooked.
Amaranth Greens are related to spinach and chard, and are usually eaten cooked.
Spinach and Amaranth leaves contain a fair amount of oxalic acid, which can cause problems for people susceptible to gout or kidney stones


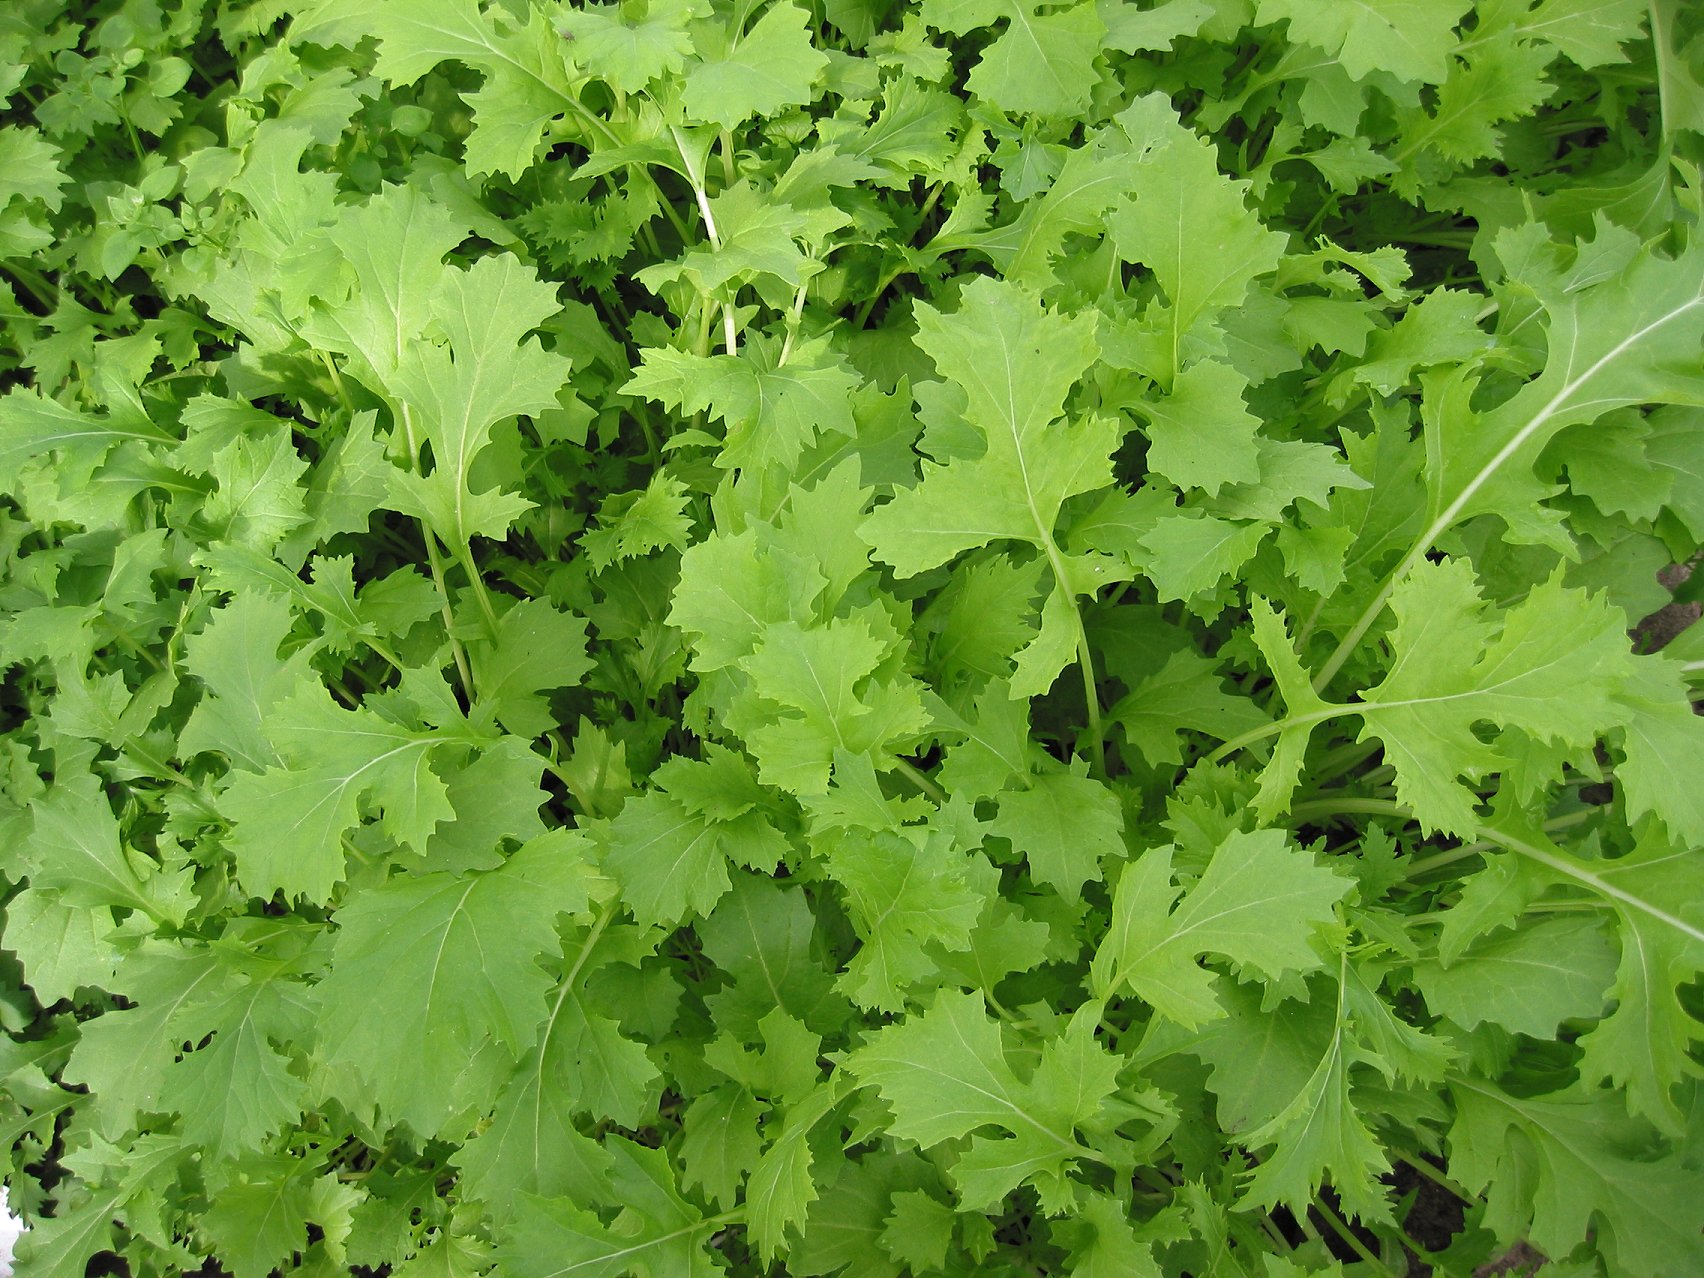
Kole greens like collards, kale, turnip and mustard greens, rapini, Chinese mustard, choy sum, bok choy and kai lan are all the same species as turnips, and are closely related to cabbage and broccoli. Most of these are served cooked, although young mustard greens are can be eaten raw in salads.
Arugula or Rocket is in the same family as cabbages, has a peppery taste, and is often used like lettuce


Taro, Kalo, Dasheen, malanga, cocoyam -- varieties of colocasia and xanthosoma have been grown around the world for thousands of years. The greens contain needles of oxalic acid, and must be cooked for a long time before they can be eaten. These greens are popular in the Caribbean and Polynesia

Weeds or uncultivated greens Other greens, such as dandelion, lamb's quarters, miner's lettuce, and purslane, are collected wild and are not as likely to show up in the supermarket. Some of these greens contain even more vitamins, minerals, and antioxidants than supermarket variety greens.

Read all of "Greens -- an introduction" ...

Monday, March 10, 2008

Fanatic Cook: Milking The Schedule

Bix blogs about an NPR commentary I missed this morning: Fanatic Cook: Milking The Schedule. Apparantly, all the cows in the US are tired today, too, on account of being woken up an hour early.

Read all of "Fanatic Cook: Milking The Schedule" ...

Caribbean Flavor: A Big Pot of Greens

A variety of greens are popular in the Caribbean, some of which actually require long cooking. But many greens can be cooked in 10 minutes.

While the Southern US pot of greens is often finished with vinegar, this version uses fresh lime juice and a little allspice for a bright, tropical flavor. Use chard (which is like a sturdier spinach leaf) or cruciferous greens such as kale (the sweetest), mustard or turnip (both of which have a mustardy snap that dissipates during cooking), or collard (which can be slightly bitter) for a hearty dish. Don't throw away the cooking liquid. That "pot liquor" is tasty and delicious.

This is my own interpretation of two tasty-sounding recipes -- Carribean style Greens and Island Collards. If you can't take the heat, leave out the jalapeño.

Caribbean-Inspired Greens

Recipe By: Family Nutritionist

-= Ingredients =-
2 lb Collard Greens ; (or kale, mustard, or turnip)
1/8 pound Bacon ; or other smoked meat
1 cup Onion ; finely chopped
1 small Jalapeno peppers ; (red) stemmed, seeded, and finely chopped
1/8 teaspoon Allspice
1 tablespoon Water
1 dash Black pepper ; freshly ground
2 teaspoon Lime juice ; or lemon juice

-= Instructions =-
Wash the greens well in several changes of water. Remove the thick rib from the center of the leaves; chop coarsely.

Chop the bacon into small bits, add to a large pot, and cook 5 minutes. Pour off any excess fat. Sauté onion, pepper, and allspice until softened -- do not brown.

Add the damp greens to the pot. Cover and cook until wilted, about 10 minutes. Add a little additional water, if necessary. Stir often. Drain, if necessary.

Stir in the lime juice and serve.

Serving Size: 0.5 cups; (151g) Calories: 82: Fat(g): 4 (49%of Cals): Sodium (g): 75
Protein: 4g, NetCarbs: 5, K: 239mg
SatFat: 2g, PolyFat: 1g, MonoFat: 2g, Chol: 5mg
TotCarbs: 9g, Fiber: 4g, Sugars: 1g

Food Group Serving(s)
DASH: Vegetables: 1.0: Fruits/Juices: 0.0: Dairy: 0.0: Grains: 0.0: Meat/Fish: 0.0: Seeds: 0.0: Fats: 0.9: Sweets: 0.0
USDA: Vegetables: 0.5: Fruits/Juices: 0.0: Dairy: 0.0: Grains: 0.0: Meat/Fish/Seeds: 0.0: Fats: 0.9: Sweets: 0.0

Nutritional information in this post calculated using bigoven. Food Group Servings calculated in EXCEL using http://www.mypyramid.gov/ and DASH diet references

Read all of "Caribbean Flavor: A Big Pot of Greens" ...

Friday, March 07, 2008

Caribbean Flavor: Black Bean Soup

The winter is coming to an end in the US mid-atlantic states. Even though this has been a mild winter, Spring fever has many people thinking of warmer weather and warmer climates. Caribbean-inspired dishes seem to hit the spot.

This dish is similar to what you can find in many Cuban restaurants in Florida. Even though it is eaten in warmer climates, it is warming enough for the tail-end of winter. Vary the seasoning with a little allspice if you want to bring to mind the flavors of some of the other islands.

This hearty vegan soup is low in fat and salt and a great favorite with the kids (if you go easy on the cayenne). Garnish with sour cream, if you like, and serve chopped onions and chilis on the side. Serve a large portion as a main course or a smaller portion as an appetizer.

You can use canned black beans, but you'll get a better flavor and avoid the salt if you cook them yourself. A pressure cooker gets the job done in 1/6 the time.

Cuban Black Bean Soup

Recipe By: Family Nutritionist
Serving Size: 15
Main Ingredient: Beans
Categories: Vegetarian, Vegan, Soup

-= Ingredients =-
7 1/2 cups Cooked Black Beans no na
1 Tbsp Olive oil
1/2 cup Onion ; chopped fine
1/2 Red bell pepper ; 1/4-inch dice
1 teaspoon ground cumin
1/2 teaspoon ground coriander
1 teaspoon Oregano
1/4 teaspoon Cayenne
1 tablespoon red wine vinegar
4 cup Low-salt Vegetable Stock
1/2 teaspoon Salt ; and pepper to taste

-= Instructions =-
One pound of dry black beans (about 2 ½ cups dry), yields about 6 ¼ cups cooked.
Three cups yields 7 cups cooked; 6 cups yields about 15 cups cooked.
For each cup of dry beans: soak in 3 cups water overnight, then drain and simmer in 3 cups of water for 3 hours, adding water as necessary. Or cook in pressure cooker with 3 cups of water for 25 minutes. Drain.

Heat stockpot on Medium-high heat. Add oil. Cook onions and red pepper, for 3-4 minutes, until translucent. Add cumin, coriander, oregano, and cayenne and cook 1 more minute.

Add black beans and vegetable stock; stir. Bring to a boil on HIGH. Reduce heat to MEDIUM. Simmer 20 min; stir occasionally. Stir in vinegar. Adjust seasoning.

Servings: 30: Serving Size: 0.8 cups (161g) Calories: 130: Fat(g): 1 (10%of Cals): Sodium (g): 200
Protein: 9g, NetCarbs: 13, K: 325mg
SatFat: 0g, PolyFat: 0g, MonoFat: 1g, Chol: 0mg
TotCarbs: 21g, Fiber: 8g, Sugars: 0g

Food Group Serving(s)
DASH: Vegetables: 0.1: Fruits/Juices: 0.0: Dairy: 0.0: Grains: 0.0: Meat/Fish: 0.0: Seeds: 1.0: Fats: 0.2: Sweets: 0.0
USDA: Vegetables: 0.1: Fruits/Juices: 0.0: Dairy: 0.0: Grains: 0.0: Meat/Fish/Seeds: 1.0: Fats: 0.2: Sweets: 0.0

Nutritional information in this post calculated using bigoven. Food Group Servings calculated in EXCEL using http://www.mypyramid.gov/ and DASH diet references


Article edited on 14 March 2008 -- I corrected my math on time savings with the pressure cooker. Thirty minutes is 1/6 of 3 hours.

Read all of "Caribbean Flavor: Black Bean Soup" ...